

Repair Roland RE-201 Space Echo Tape Delay Reparatur Service
17. März 2020
Repair Roland Alpha Juno 2 Vintage Analog Synthesizer Reparatur Service
5. April 2020Repair Solton Disco 64 Vintage Analog Keyboard Synthesizer Reparatur Service
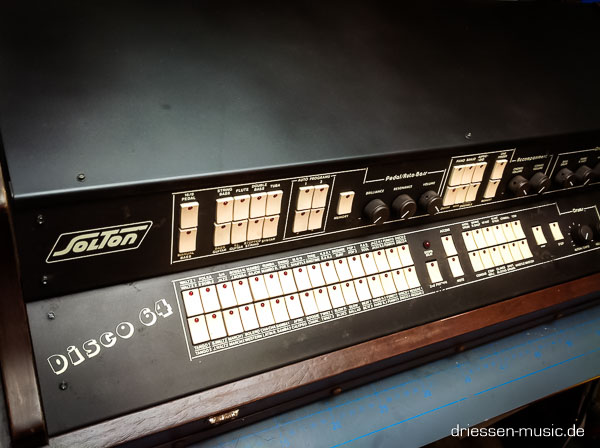
Repair Solton Disco 64 Vintage Analog Keyboard Synthesizer
Restoration of an 80’s ultrarare Solton Disco 64.
Some sections were working, not all rhythms, not all instruments were playing. The cosmectic condition the the Solton was not really like mint. There was corrosion and substances from moisture like everywhere. On the functional side there were also some issuses..
Let´s do it...
Some sections were working, not all rhythms, not all instruments were playing. The cosmectic condition the the Solton was not really like mint. There was corrosion and substances from moisture like everywhere. On the functional side there were also some issuses..
Let´s do it...

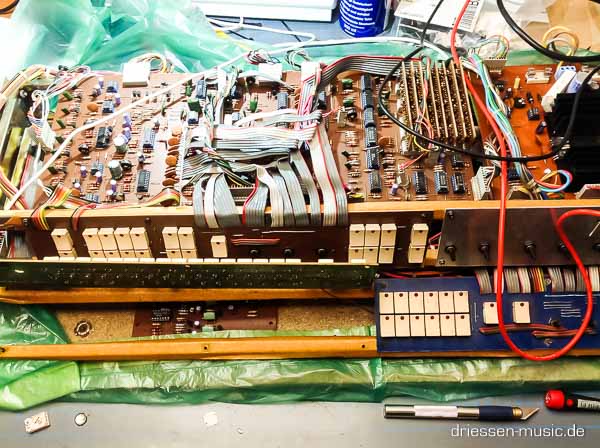
The first picture is a good example what to expect. You can see signs of moisture on the surface of the Solton keyboard. Luckily enough it came with the keyboard. There are some Soltons out there, that even don`t have a keyboard. Having the Solton without the keyboard is like having only 50%. You can see in my other pictures, how bad the corrosion really was.
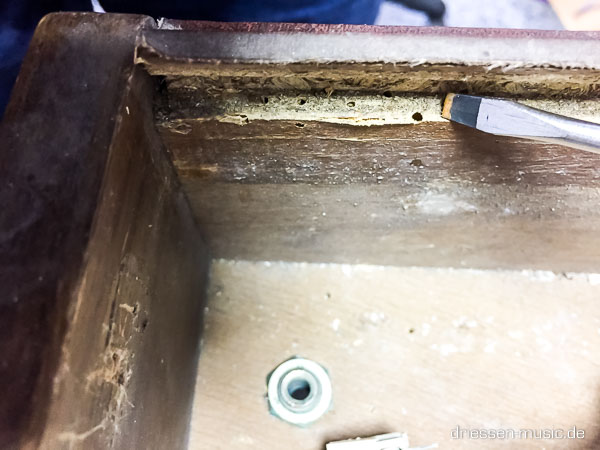
There also was a woodworm doing some damage to the Solton, but I am pretty sure, he is gone now ;)
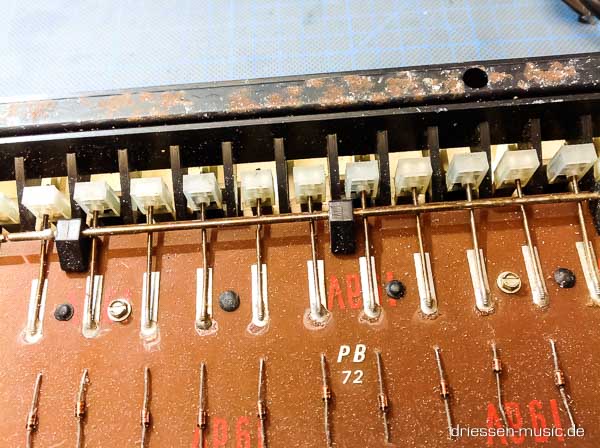
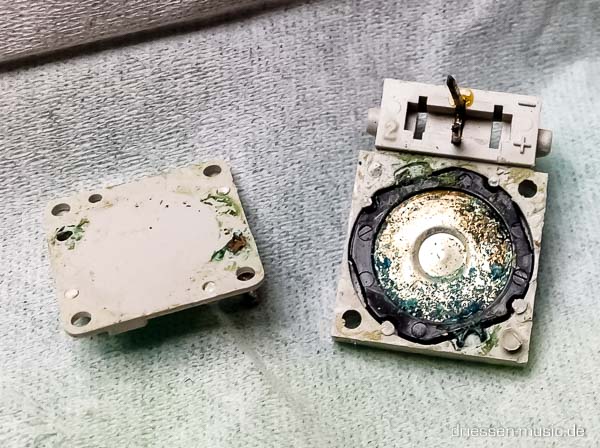
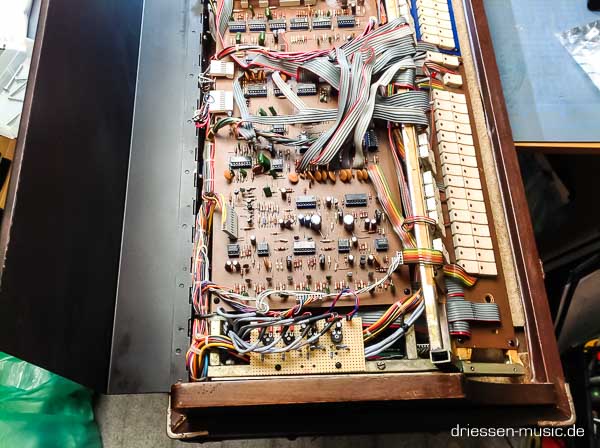
The Keyboard contacts were heavily corroded and dirt was everywhere.So I desoldered all the contact springs, removed the bus bar and cleaned one by one by hand using IPA (Isopropanol). There also was a crack in the keyboard case that was fix with epoxy.
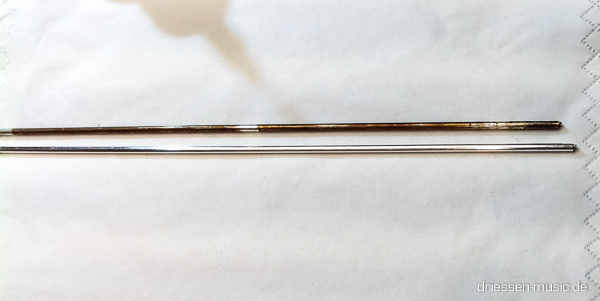
Here's a detailed picture of the so called "bus bar". The top bus bar is non cleaned and the lower is professional cleaned. You can imagine, that playing on this keyboard is like accidently triggering notes.
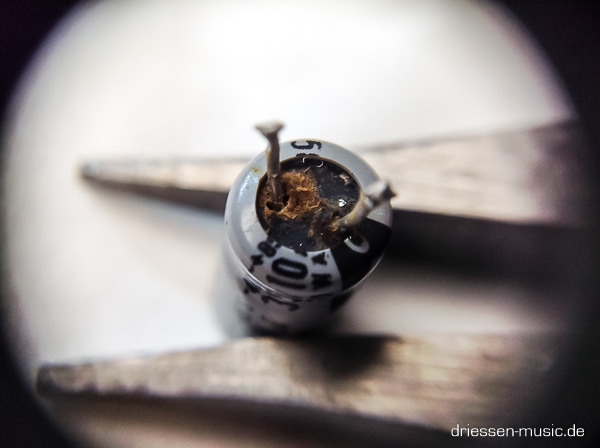
Next issue to address was some missing rhythm patterns. Some buttons wre just not working. So I desoldered them to see whats going on here. On the one hand I wasn#t surprised that, again, moisture (wrong storage) was causing the issue, but on the other hand I was shocked, how much corrosion was going on here. This switch is stone dead. Not working at all.
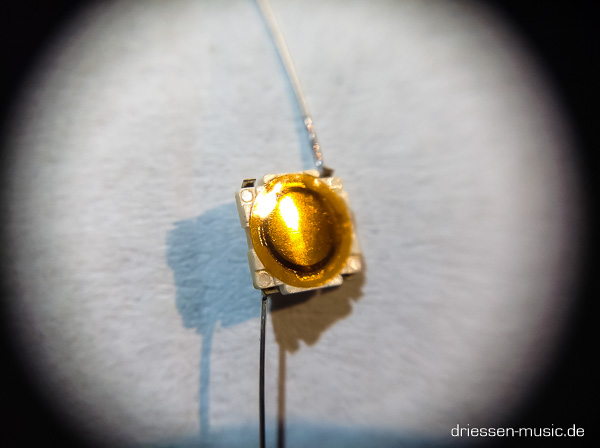
Since the is was replacement switch available, no new old stock, no modern replacement, I had to come up with a Dr. Jay solution. I ordered some tiny little tactile switches that fitted inside the old buttons and gave them the right "click" sound and feeling. It was just some patience needed to solder on these fine wires and re-assemle the buttons.

Next I replaced all the corroded wiring and reflowed all the weak solder joints.
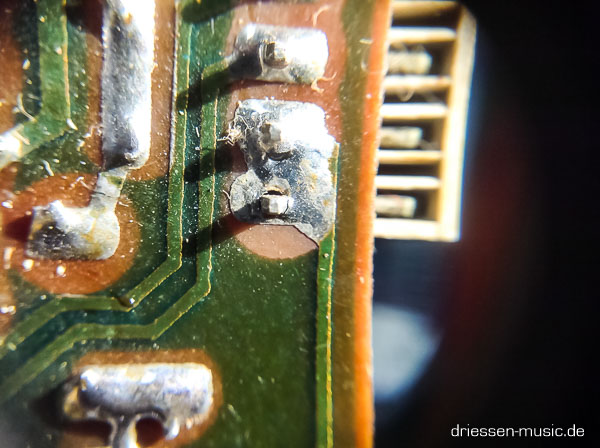
Re-Flowing all weak solder joints is crucial on old vintage synths, especially on connectors. In this case the synth sound was intermittend.
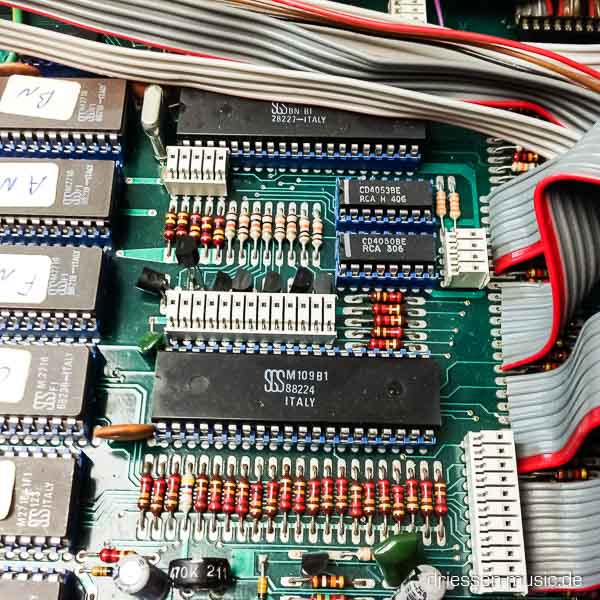
Since restoring the buttuns did not bring all rhythm patterns back to life I had do do some more trouble shooting. I figured out that the key assigner IC Siemens SM 304 A were faulty. I replaced that with NOS. Now all push buttons were fully working.
The rhythm melodies weren't playing correct. That was caused by some logic ICs and op-amps on the main voicing board, upper left. I replaced these and now all the melodies and strings came back to life.
Now that trouble shooting is over, I went over and replaced all the electrolytic capacitors. Whenever I see these purple Matsushita caps I instantly know, that the synth suffers from leaky capacitors and if not now, they will in the near future. Often the electrolyte is coming thru the sealed cap, spreading their electrolyte all over the place and do corrosion and damage to the synth. They all have to go !
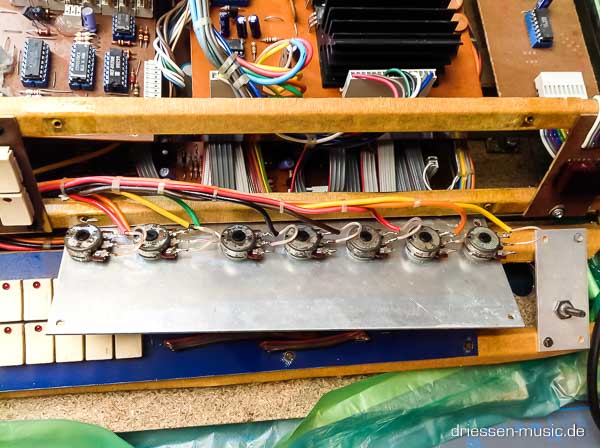
I replaced all the potentiometers. Since they are widely available it's much cheaper and more effective to replace them and not to refurbish them.
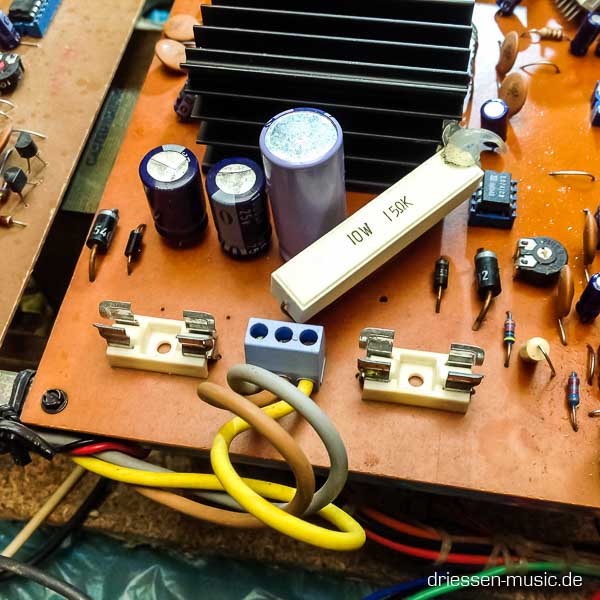
I replaced the 10W "heater" resistor in the psu (5V rail) with a modern step down module which got barely warm. The old resistor also destroyed the 2 ceramtic fuse holders and the fuses. While checking them they fell into pieces like glass. This restistor was hot like hell. I measured 100°C after a few minutes. It was there to drop down the voltage for the old 5V regulator. Now it`s no longer needed. I also re-newed the heatsink compound on the leftover voltage regulators.
This Solton also should get some mods. If not MIDI, but individual outputs and trigger outputs.I grabbed the individual drum outputs from the drum voicing board (lower right) and buffered them on a small pcb with transistor based amps. I also buffered the TTL trigger outs that I grabbed from the connector between cpu board and drum board.
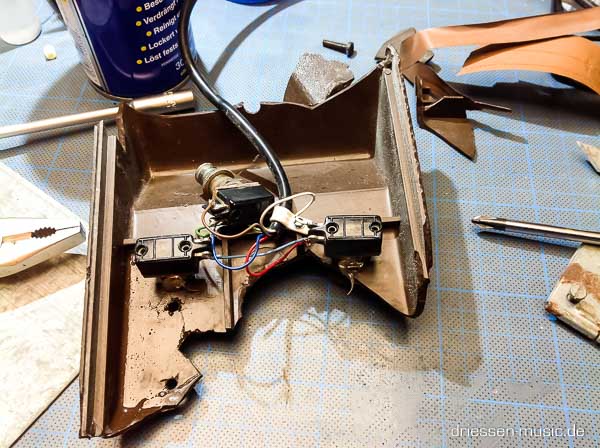
The original footswitch was fragmented. I glued this thing together to have it original as possible (a lot of pieces were missing), but I also created a modern version, not a real footswitch, but a remote switch to use all the functions of the Solton Disco 64.
I did a few more cosmetic repairs. I used on old plug of the back for the trigger outs. I put everything back together and we got great result.
Caution
There are lethal voltage exposed in electronic devices. Unless you know what you are doing, don’t try this. If you following along, you doing so at your own risk.
Caution
I’m documenting repairs for my reference and yours.
I do synth restorations and repair with a specialty in vintage synthesizers, drum computer and other vintage gear, based in Düsseldorf, GER. Get in touch about your synth situation!


Related posts
17. Oktober 2022
20. März 2022
3. März 2022